Diving into the world of orchid propagation is like unlocking a treasure trove for enthusiasts eager to broaden their collection and spread the exotic allure of these plants. There’s a spectrum of methods at your fingertips, each tailored to cater to the unique needs of different orchid species and growing environments. Mastering these techniques becomes the compass guiding orchid growers toward vibrant, thriving blooms that stand the test of time. Ready to embark on your propagation journey? Let’s dive into the lush realm of orchids!

Delving into orchid propagation is like unlocking nature’s cloning secrets. Plant division, a classic maneuver, suits orchids flaunting multiple pseudobulbs. Slice a mature orchid into segments, granting each a shot at independent glory.
Then there’s the enchanting world of keikis—tiny plant offspring sprouting on flower spikes or the plant’s base. They’re nature’s way of saying, “Let’s make more!”
And don’t forget the quirky back bulbs and root division methods, each a tailored dance for specific orchids. Armed with the right tools and wisdom, growers embark on a propagation journey, snipping, cloning, and nurturing until their orchid haven blossoms into a symphony of diverse species and a riot of ever-growing blooms. Ready to propagate your way to orchid ecstasy? Let the cloning adventure begin!
Understanding Orchid Biology
An in-depth understanding of orchid biology is essential for successful propagation, as it directs the appropriate methods to be used in growing an orchid collection. The intricate structures and growth patterns of various orchid types come into play when growers aim to reproduce these unique plants.
Orchid Structure and Growth Patterns
Unlocking the secrets of orchid propagation involves understanding their intricate growth patterns. Orchids, the divas of the plant world, flaunt two primary styles: monopodial and sympodial.
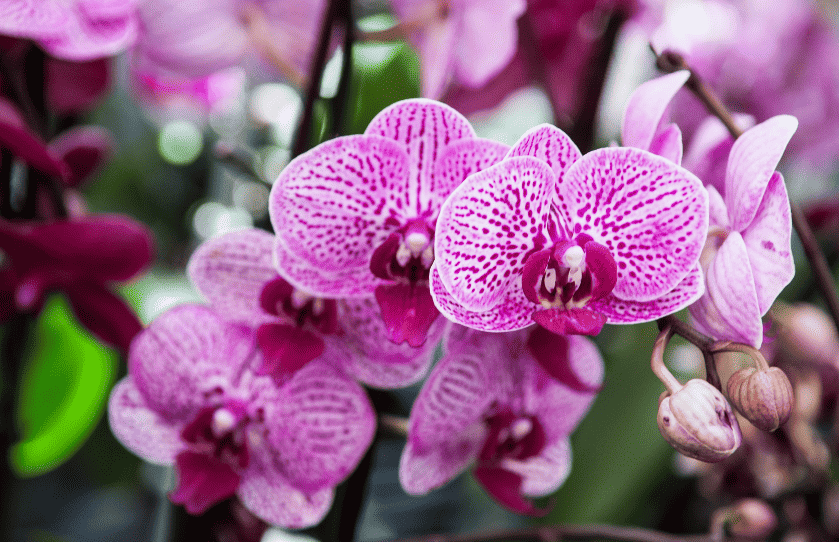
Picture the monopodial orchids, like the glamorous Phalaenopsis, standing tall with a single stem. Aerial roots dance around, sipping moisture and nutrients from the air. Their leaves elegantly arrange themselves along the stem, with fresh growth emerging from the crown, creating a botanical masterpiece.
Now, let’s groove with the sympodial orchids, rocking a horizontal rhizome that births pseudobulbs. These pseudobulbs shoot up, each boasting its own set of leaves and roots. It’s a vertical party erupting from the rhizome, showcasing a variety of leafy styles depending on the orchid species.
When it’s time for orchid replication, sympodial orchids opt for stem cuttings and rhizome division, ensuring the botanical legacy continues in style.
Types of Orchids
Orchids encompass a vast family of plants, with over 25,000 species recognized worldwide. While they can all be classified as either monopodial or sympodial, the diverse genera within these categories exhibit various characteristics adapted to their environments. Each type of orchid may present unique challenges and require specific propagation methods. For instance, some orchids propagate easily via nodes on the stem, where new shoots can be encouraged to grow, while others may form keikis (baby plants) spontaneously.
The aerial roots of monopodial orchids, particularly prominent in some genera, are fleshy and serve as an adaptation for absorbing moisture and nutrients in their natural habitats. In sympodial orchids, the pseudobulbs store water and nutrients, which helps them withstand periods of drought. The understanding of these structures is crucial for propagation, as it dictates the timing and methods used, ensuring minimal damage and maximum potential for new growth.
Propagation Basics
The fundamental techniques in expanding your orchid collection lie in understanding the specific propagation methods and the essential tools required for success.
Propagation Methods Overview
Orchid propagation can be carried out in several ways depending on the type of orchid and the grower’s preference. The most common methods include division, where a mature orchid is separated into smaller parts, and the cultivation of keikis, which are offshoots that form on the mother plant. Another technique is using back bulbs, which are dormant parts of the orchid that can be encouraged to grow. Lastly, some propagate through root division, which involves separating the root system.
Essential Tools and Materials
For successful orchid propagation, specific tools and materials are essential:
- Sharp Knife: A sterilized sharp knife is crucial for making clean cuts during division.
- Orchid Pots: Appropriate-sized pots are needed for the newly propagated plants.
- Potting Mix: A suitable orchid potting mix, often including orchid bark and sphagnum moss, is vital for the growth of new orchids.
- Ties: To secure the orchid when potting.
- Fungicide: The application of fungicide or natural alternatives like cinnamon can help prevent infection at the cut sites.
Asexual Propagation Techniques
Asexual propagation allows the grower to reproduce orchids without the need for seeds, ensuring genetic clones of the parent plant. These techniques are useful for expanding an orchid collection or salvaging healthy parts from a damaged plant.
Division
In the world of orchid TLC, division takes the stage, especially when dealing with sympodial orchids. It’s like giving these plants a social makeover. So, here’s the backstage scoop: imagine your orchid as a superstar, and division is when it decides to go solo or form a new band.
To make it a smooth gig, each division needs to have at least three pseudobulbs – think of these as the cool crew members. The process kicks off by gently pulling your orchid out of its container, grabbing your trusty sharp shears, and making the cut through the rhizome. It’s basically the plant version of a stylish haircut.
Now, each newly minted division gets its own VIP ticket to a fresh container, carefully chosen to match its newfound size and vibe. It’s all about setting the stage for a flourishing encore.
Keikis and Keiki Paste
Picture this: in the fascinating world of orchids, there’s a magical phenomenon called keikis. These little wonders are like the adorable offspring of orchids, often making their debut on the flower spikes, especially in the cool monopodial varieties.
Here’s the fun part: Enter Keiki Paste, the fairy godparent of orchid enthusiasts. It’s not your ordinary paste; it’s packed with special hormones that work like a charm. When you delicately apply this potion to a node on the flower spike, it’s like giving it a gentle nudge, saying, “Hey, let’s grow some baby orchids here!”
And why do we bother with all this keiki magic? Well, it’s the express route to expanding your orchid family album without the endless waiting game of seed growth. It’s like having an orchid nursery at your fingertips, making your collection bloom with new life in no time.
Back Bulb Propagation
Imagine you’re orchestrating a mini orchid miracle – that’s what back bulb propagation is all about. You see, orchids sometimes stash away these non-flowering pseudobulbs called back bulbs. It’s like their secret vault of growth potential.
Now, here’s where the magic happens. With a bit of care and finesse, you delicately separate these undercover back bulbs from the main crew. It’s like giving them their own VIP treatment. Add a touch of high humidity and dial in the perfect temperature – the backstage pass for new shoots to steal the show.
It’s the orchid version of creating a superstar from the shadows. Your orchid family expands, and those once-overlooked-back bulbs become the unsung heroes of your thriving orchid collection.
Stem Cuttings
Picture this as the orchid version of crafting a botanical clone – a bit like growing a plant doppelgänger. So, here’s the lowdown: some orchids, like the ever-unique Vanilla, are up for the stem-cutting propagation game.
Grab a stem section with multiple nodes – the more, the merrier. Now, find a cozy spot for it in a bed of rich, growing medium. Think of it like tucking your orchid into a snug botanical blanket. Add a dash of high humidity and warmth, creating a little tropical paradise for your cutting.
Keep your eyes peeled, and voila! Before you know it, new shoots emerge, and you’ve just orchestrated a symphony of growth. It’s like creating an orchid twin – nature gives you more of what you love.
Offshoots and Offshoot Division
Meet the “pups” of the orchid world – those adorable offshoots that bring new life to the plant family. In sympodial orchids, these little green wonders often pop up, creating mini-me versions of the parent.
When your offshoot has grown enough roots and leaves to stand on its own (cue the proud parent moment), it’s time for a gentle separation and a fresh pot to call home. Think of it like orchestrating a botanical family reunion, where the new addition is a genetic twin to the parent orchid.
Precision is key here – sharp shears ensure a clean break, and a touch of extra care guarantees a seamless transition for your offshoot. Consider it the plant version of fostering a new family member – growth, love, and a touch of green magic.
Sexual Propagation Techniques
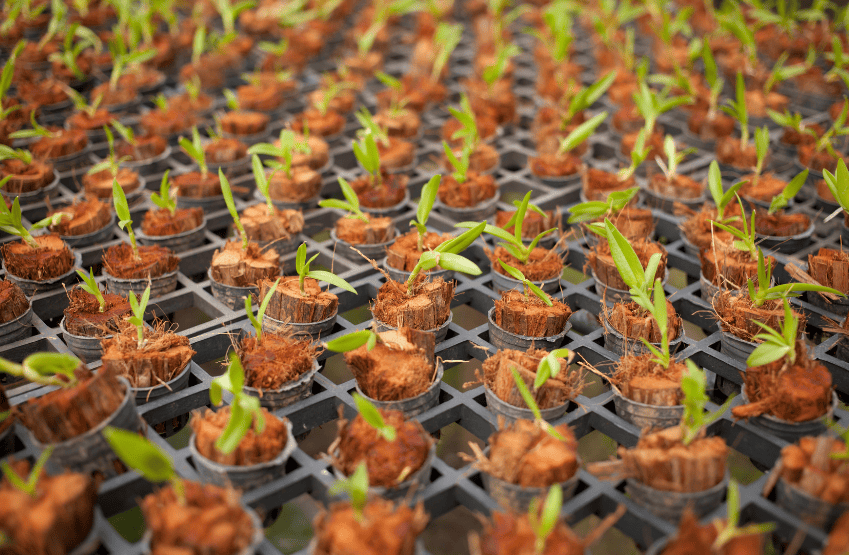
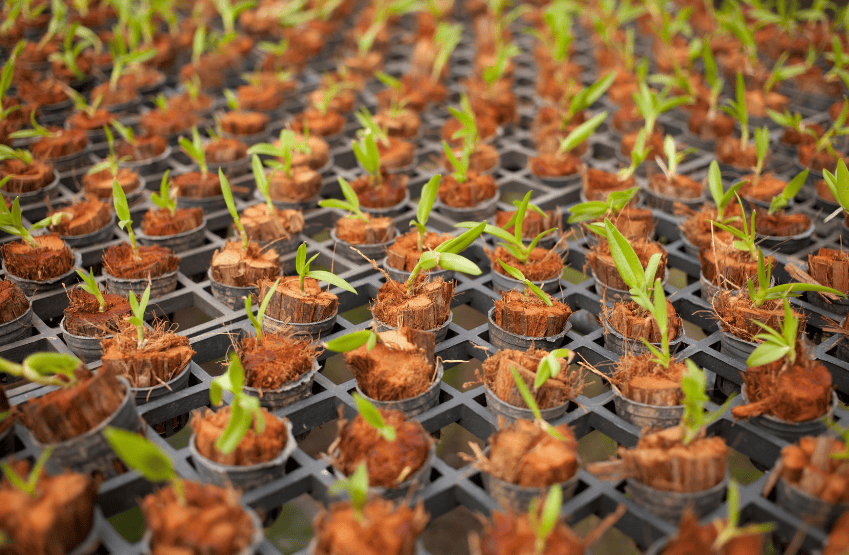
Sexual propagation of orchids involves the growth of new orchids from seeds. This process is complex and requires a controlled environment, like a greenhouse, to be successful.
Seed Propagation
Orchid seeds are incredibly small and do not contain stored nutrients, necessitating a symbiotic relationship with a fungus to provide the necessary nutrients for germination and initial growth. The propagation through seeds typically follows these steps:
- Collection: Seeds are harvested from the flowering stem of the orchid once it has bloomed and the seeds have matured.
- Sterilization: To prevent fungal or bacterial contamination, seeds are sterilized with a bleach solution or alcohol before sowing.
Seed germination and growth occur in several stages:
- Sowing: Seeds are sown in sterile flasks containing a specialized growing medium that promotes the symbiotic fungal relationship.
- Germination: It may take weeks to months for seeds to germinate in the greenhouse conditions, with the precise time varying per species.
- Seedling Development: Following germination, the growth into seedlings is slow, often requiring several months to a year before they are strong enough for the next stage.
- Deflasking: Once seedlings have developed enough to survive outside the flask, they are carefully removed and acclimatized to less controlled conditions.
Diving into the world of orchid propagation through seeds is like embarking on a patient gardener’s odyssey. This method isn’t for the hasty, as the journey from planting that tiny seed to witnessing a mature, blooming orchid can span years. It’s a growth marathon, a saga for those with a penchant for nurturing new hybrids and cultivating orchid abundance.
Caring for New Orchids

Proper care is essential for new orchids to thrive. Focusing on the right potting mix, watering routine, light exposure, and fertilization will ensure healthy growth and beautiful flowers.
Potting and Repotting
Revamping your orchid squad? Opt for a potting mix that’s all about the good vibes – think stellar drainage and aeration. Vanda orchids groove with a blend of fir bark and perlite, giving them the breezy vibes they adore. Cymbidiums, on the other hand, might fancy a smoother mix. Shake things up every two to three years or when the potting medium hits a style rut – a dash of repotting prevents any root rot blues.
Watering and Humidity
New orchids need consistent watering to encourage root growth but can suffer from over-watering. The amount of water required depends on the orchid species and the growing environment. A high level of humidity, typically around 60-70%, is advantageous for most flowering plants. This can be achieved with regular misting or using a humidity tray.
Light and Temperature
Orchids flourish under bright, indirect light. Direct sunlight can scorch their leaves, while insufficient light can inhibit flowering. To simulate a natural environment, maintain a temperature range suitable for the orchid species with warmer days and cooler nights. This temperature variation is beneficial for bud formation in mature plants.
Fertilization and Disease Prevention
Feed new orchids with orchid food during their active growth period, which typically means applying a balanced fertilizer every other week. To prevent disease, use fungicides only as necessary and ensure proper air circulation to avoid high humidity conditions that can foster the growth of fungi and bacteria. Regular inspection of your orchid collection is key to early detection and treatment of any issues such as rot or pest infestations.
Troubleshooting Common Propagation Issues

When propagating orchids, enthusiasts may encounter several issues that can impede the growth of their houseplants. It’s crucial to identify these problems early and apply the appropriate remedies to ensure the success of your propagation efforts.
Rot:
One of the most common issues is rot, which can occur in both the roots and the base of the orchid. Rot typically manifests as a mushy, discolored, and often foul-smelling section of the plant. To address this, one should cut away the affected parts with sterilized scissors or pruning shears, being sure to remove all rotting tissue. After cutting, applying a fungicide or natural alternatives like cinnamon can prevent further infection.
Fungal Infections:
Fungi thrive in high humidity and can easily infect an orchid during propagation. Using a fungicide is recommended for treating infected plants. However, prevention is key. Ensure that the environment isn’t excessively humid and that there is good air circulation around the plants.
Flower Spikes:
While propagating by flower spikes or “keikis,” growers might find the new growths are weak or fail to develop. This is often due to inadequate light or nutrients. Ensure the keikis receive sufficient light and consider a balanced fertilizer to boost their growth.
Impotence of Sterilization:
Always use sterilized equipment when making cuts on an orchid to prevent the spread of disease. Before each use, tools should be sterilized, which can easily be done by wiping them with alcohol. Alternatively, one can utilize cinnamon powder, a natural antiseptic, on the cuts to promote healthy healing.
Lastly, it’s important for orchid growers to remain patient. Some orchids can take a while before they show signs of successful propagation. Maintain a regular care routine and monitor the plants for any signs of distress. With the right steps, common propagation issues can be managed effectively, leading to a thriving orchid collection.
Enhancing Your Propagation Success

When propagating orchids, a thorough understanding of the types of orchids is paramount for success. Sympodial orchids, which grow horizontally, are often propagated through division, while monopodial orchids, growing vertically, can be propagated by removing keikis from the flower spikes.
To increase the chance of successful orchid propagation, consider the following:
- Optimal Conditions: Propagate during the orchid’s growth season, ensuring adequate light, temperature, and humidity.
- Clean Tools: Always use sterilized cutting tools to prevent the spread of disease.
Division Method for Sympodial Orchids:
- Carefully unpot the orchid, minimizing root damage.
- Identify natural divisions with at least three pseudobulbs.
- Separate the divisions with a clean cut.
- Plant each division in fresh, appropriate potting media.
Keiki Propagation for Monopodial Orchids:
- Wait until the keiki has several roots at least a few inches long.
- Gently detach it from the parent plant.
- Pot it separately in suitable orchid media.
Orchid growers can also enhance success by:
- Rooting Hormones: Aiding root development in cuttings.
- Moisture Management: Use clear plastic bags to maintain high humidity around new plantings.
For most effective results, patience and attentiveness to each plant’s needs are critical. Monitoring your growing plant collection for signs of stress or growth can help tailor your care approach and improve your propagation outcomes. Remember, propagation is as much an art as it is science, and success often increases with experience.
Building a Diverse Orchid Collection

Creating a diverse orchid collection requires strategic planning and understanding the various genus types available. Phalaenopsis, Cattleya, Dendrobium, Oncidium, Cymbidium, Vanda, and Angraecum encompass a broad range of orchids that appeal to many enthusiasts.
- Phalaenopsis, commonly known as “moth orchids,” are adaptable and flourish in home environments. Adding these to your collection can provide blossoms year-round.
- Cattleya orchids, with their stunning blooms, are a must-have for collectors seeking vibrant colors and a variety of flower forms.
- The Dendrobium genus offers elongated stems and a plethora of flowers, making them a unique and eye-catching choice.
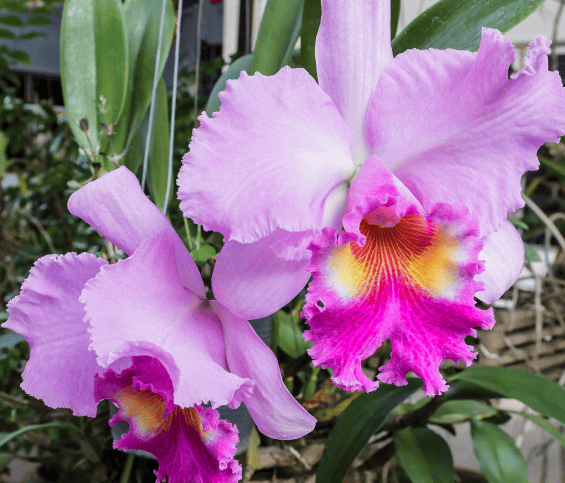
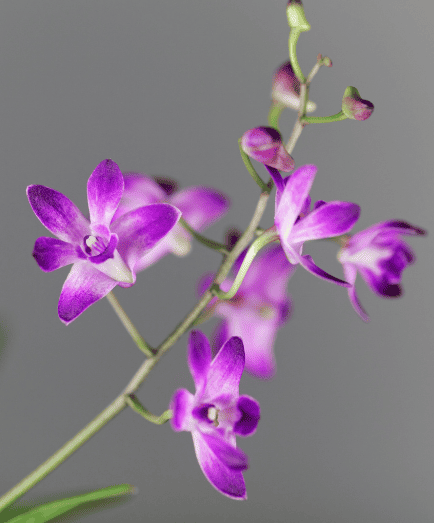
Incorporating Oncidium and Cymbidium orchids can introduce different textures and patterns when growing a collection. For those with more experience, venturing into the exotic realm of Vanda and Angraecum orchids, with their distinctive and aromatic flowers, can be rewarding.
Collectors should consider plant division as a primary method for propagation:
- Phalaenopsis and Cattleya can be divided when they have multiple pseudobulbs.
- Dendrobium and Oncidium may be split along their rhizomes or pseudobulbs.
For beginners, understanding individual orchid needs can lead to a thriving orchid collection. Orchids can live harmoniously in homes, provided their specific light, temperature, and humidity requirements are met. Collectors should research care requirements to ensure a healthy and diverse collection.
Frequently Asked Questions

This section addresses common inquiries on expanding an orchid collection through propagation, detailing methods and steps to ensure successful growth.
What are the most effective methods for propagating Phalaenopsis orchids?
For Phalaenopsis orchids, the most effective propagation methods typically involve vegetative propagation, such as Keiki growth and division.
Can you explain the step-by-step process for growing orchids from cuttings?
To grow orchids from cuttings, one should cut a section of the stem with healthy nodes, apply rooting hormone, and plant it in a suitable medium with high humidity and indirect light. Detailed steps can be found at The Spruce guide.
How do professional nurseries typically propagate orchids for commercial purposes?
Professional nurseries often use tissue culture for orchid propagation on a commercial scale, as it enables the production of many plants from a small piece of the original in sterile, controlled environments.
What are the advantages of water propagation for orchid plants?
Water propagation provides a direct view of root development and can sometimes hasten the rooting process for some species of orchids; however, it must be done with keen attention to avoid rot.
How can you successfully propagate orchids by using the keiki (baby plant) growth technique?
Keiki propagation involves removing the keiki from the mother plant once it has developed sufficient roots and leaves, and then potting it separately to develop into a mature plant. Success tips are highlighted by Epic Gardening.
Are there different propagation methods for various orchid species, and if so, what are they?
Yes, different orchid species may require specific propagation methods such as division for sympodial orchids or keiki paste for monopodial orchids, aligning with their unique growth patterns. Methods vary, as discussed on Homes and Gardens’ website.

